Replacing Floor Laminate After Fire Damage – How To
 Spring and winter showers aren’t just limited to a bit of rain but can include a wide range of weather activities as well. With powerful winds and the summer heat or winter frost, they can lead to severe water damage, mold, or even fire damage, especially for floor laminates.
In a fire, you will have a lot of things to worry about and the laminate may be the last thing you notice – and rightly so. However, as you cater to more important elements, such as your personal belongings, business equipment, papers, pictures, upholstery, and more, you will eventually have to deal with the laminate as well.
You have the option of either asking a professional home restoration company to replace the laminate for you or if you are good with tools and don’t mind the extra work, you can do it yourself as well. In this article, we will go over how you can replace floor laminate after fire damage and the important things to consider when doing it.
Replacing Floor Laminate After Fire Damage
After a fire, you will most likely have water in your home (from the fire department or the rain). This water can lead to mold, further weakening the structure. Apart from that, standing water can deform your laminates. While some may be reparable, such as cupped or expanded laminate, others may need replacement.
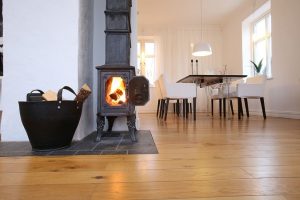
On the other hand, fire can singe your laminate’s corners, introduce air bubbles underneath the laminate, deform it beyond repair, or render the glue beneath useless. This is precisely why laminates aren’t recommended for kitchens or near other heat sources.
Here is a detailed overview of what you can do to replace floor laminate. If the fire wasn’t that extensive, i.e., you didn’t use a fire extinguisher or call the fire department, you can skip the first two steps.
1. Extract the Water
Start by pumping or draining out the water. If the water is from a sewage overflow, we recommend getting out of your home and calling professionals to do this for you. If the water isn’t too extensive, or if you don’t have a water pump, use towels or blankets to soak up the water and drain it out.
As a rule of thumb, if the standing water is more than an inch, get a vacuum or water pump. Because of the fire damage, avoid rubbing the towels with the floor when soaking up the water, else you risk causing stains from the soot.
2. Dry the Floor
Once the water has been drained/removed, it is time to dry the place. Wear a facemask when doing so as the fans will throw carbon and mold spores around. We recommend renting industrial fans (3-4) and dehumidifiers (4-5) for quicker results, and therefore reduce the risk of mold.
You can give 911 Restoration of Emerald Coast a call to get a better understanding of what equipment you need, and how much of it.
3. Start Removing Soot/Smoke Residue
The drying and removing process will probably take at least a day. We recommend starting the clean-up process only once the area is dry. Use a dry cleaning sponge to clean the soot and smoke left by the fire damage. Avoid pressing too hard against the floor, i.e., grinding the soot below.
Start from the center of your laminate and move towards the corners.
4. Remove Fire-Damaged Items
After the soot and smoke have been removed, you will need to clean the stains left behind by the fire. Mix 4-5 tablespoons of dishwashing liquid into a gallon of lukewarm water and use a sponge to SOFTLY scrub the floor. If you have hardwood floors, squeeze the sponge before scrubbing the floor, and if you see a very deformed or damaged piece of wood, avoid water contact completely.
You may need to replace such damaged areas.
Scrub in small circles and with the grain to avoid streak marks or scratches. You may need to work every single spot at least 2 to 3 times, as soot can leave behind a very sticky residue. This is why you should use dish soap.
Before scrubbing a place, decide whether it’s worth keeping the laminate there or not. You have already removed the soot and smoke residue, so you should have a pretty clear picture about which laminate will survive and which won’t.
Remove the extensively damaged laminate. If you have glazed tiles on the floor, all you will have to do is use soapy water, a brush, and a wiper. Laminate will need to be removed, for which you need a soft scrub so as not to damage the surface below.
5. Rinse the Floor
Once all the stains have been successfully removed off the floor, it is time to rinse the floor and remove any debris left from the scrubbing. Use a bucket of clean water for tiles or a fresh, slightly damp mop/rag for wood floors.
Be careful you don’t end up leaving stains with the mop. Use long, steady strokes and replace the water whenever it gets murky.
6. Replace Damaged Laminate
Let the floor dry a bit. While that happens, assort the new laminate you want to install, get some:
- Flooring glue
- A spirit level,
- Barrier sheet
- Polyethylene tape (for cleanliness)
- A damp, fresh cloth.
You may need to sand the surface as well if the floor is hardwood to make room for the adhesive and to get rid of the stains completely. Install one laminate at a time, making sure there is no overlapping and the level is being maintained.
And that’s all there is to it! Of course, there is a question of expertise as well. By hiring expert disaster restoration services or fire damage restoration companies, you can cut the time it takes for the laminate replacement procedure by half. 911 Restoration is here to help you get reliable and on-time help, whenever you need it. Give us a call today to learn more about our 24-hour service and 30-minute response time.